
Introduction
To be able to compile and run Java programs we need to install a Java Programming Environment on our desktop. The installation process will be done in two steps:
- The installation of the Java Standard Edition (Java SE) software;
- The installation of an Integrated Development Environment (IDE).
Installation of the Java Standard Edition
The Java Standard Edition (Java SE) software package includes the Java Development Kit (JDK) and the Java Runtime Environment (JRE). The JDK contains the Java compiler (called javac). The JRE includes the Java Virtual Machine (JVM) and everything that is needed to run Java bytecode.
The Java SE package is available for Windows, macOS, Linux and Solaris. Oracle provides the Java SE package free of charge.
All information to install the Java SE development kit is available on the Oracle website. All available downloads are listed on the Oracle downloads page. Installation of the Java SE development kit is straightforward.
Installation of the Integrated Development Environment
An Integrated Development Environment (IDE) is an application that helps software programmers to develop programs. Traditional IDE applications consist of a source code editor and contain a link to compile and run programs without leaving the IDE application.

Many IDEs are available on the internet. Examples are IntelliJ, Netbeans, Eclipse, BlueJ… In this course we opt to use the lightweight but powerful IDE jGRASP, developed by a team of developers at Auburn University (USA). jGRASP is available for Windows, macOS and Linux. The jGRASP IDE is available free of charge and can be downloaded from the website https://www.jgrasp.org.
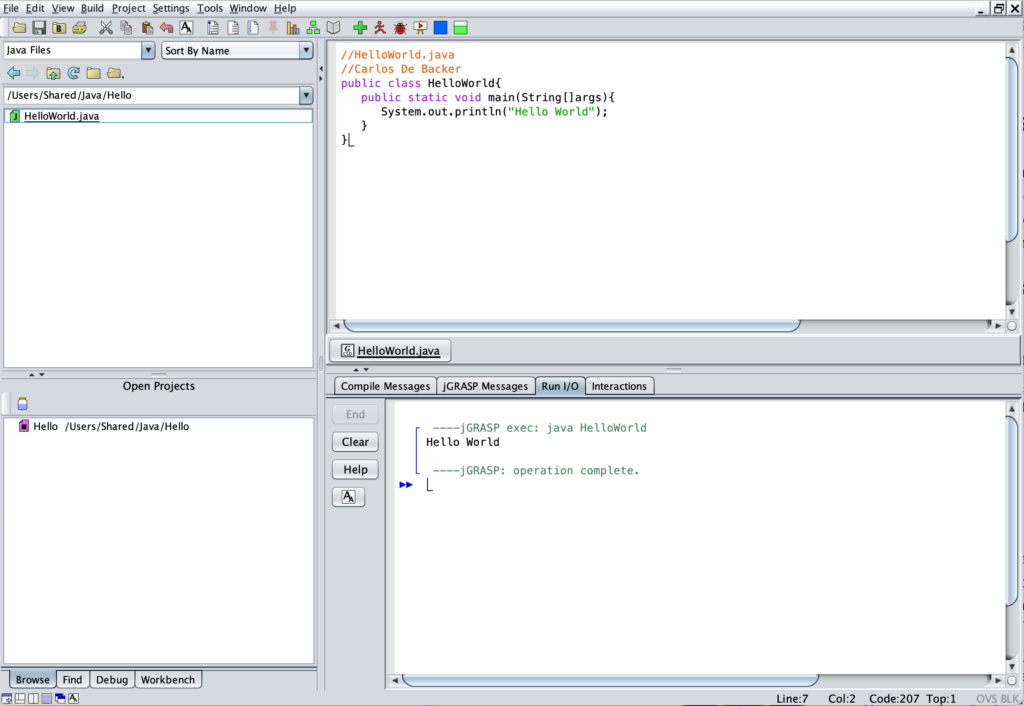
The picture below is a screenshot of the jGRASP IDE.
Our First Program
The following Java source code will be used to test our Java programming environment:
//HelloWorld.java
public class HelloWorld{
   public static main(String[] args){
      System.out.println("Hello World");
   }
}
- From the main menu select File->New->Java.
- Enter the Java source code in the empty right-hand side top window. Be very attentive when inputting the source code: the Java language is case-sensitive (e.g. de keywords System and String must start with a capital ‘S‘) and round ( ), square [ ] and curly brackets { } are very often required and must be opened and closed .
- From the main menu select File->Save and enter the name of the file to store the source code. The name of the file must be the name of the class (HelloWorld) with the extension .java appended (HelloWorld.java).
- Hit the green plus icon
 in the menu to compile the source file (HelloWorld.java ) into the Java bytecode (HelloWorld.class).
 - Hit the red walking man icon
 in the menu to execute the bytecode (HelloWorld.class). The text (“Hello World“) is displayed in the right-hand side bottom window.